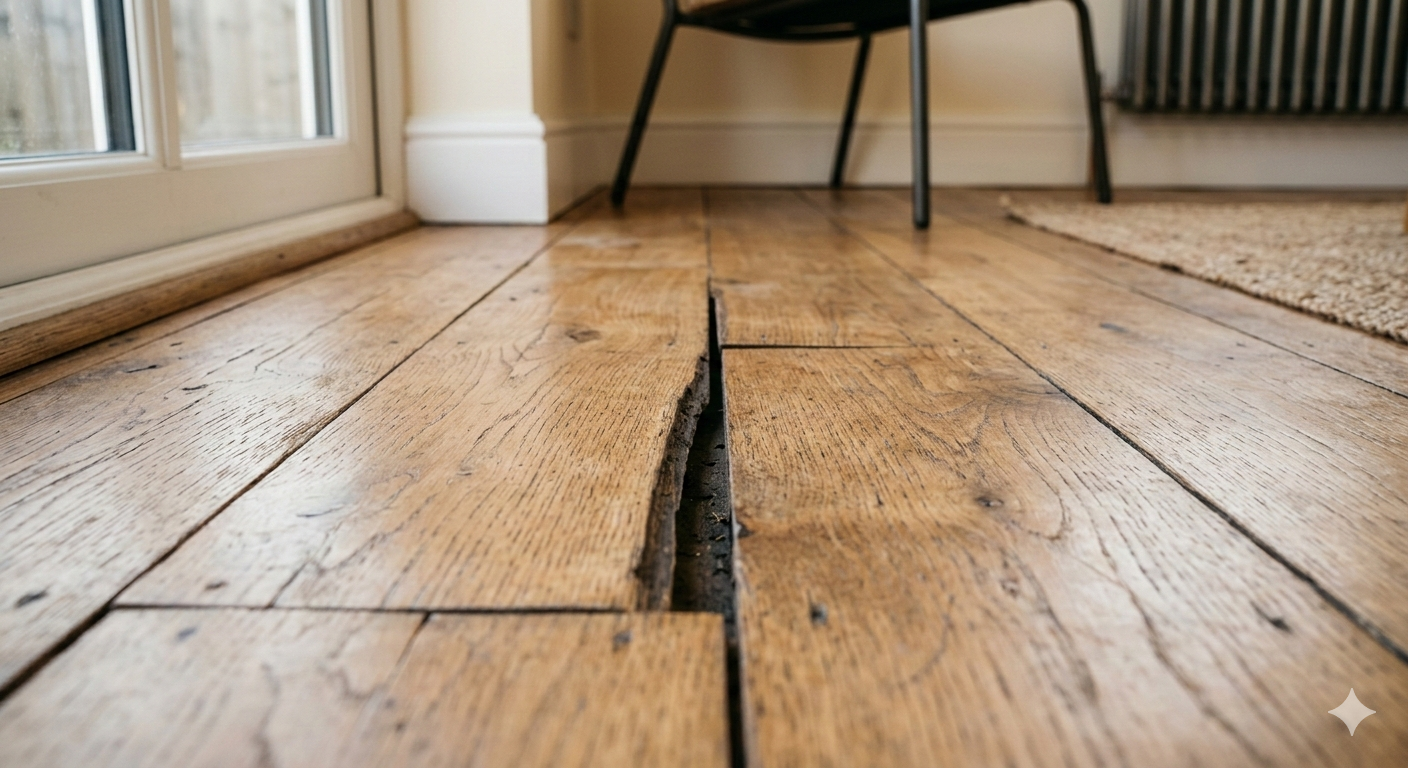
Floor gaps are one of the most common problems homeowners face after installing floating floors. These gaps not only affect the appearance of your home but can also collect dust, debris, and even pests over time. Luckily, fixing them doesn’t have to be difficult. In this guide, we’ll show you three effective methods to close floor gaps and explain why they happen in the first place.
Why Floor Gaps Happen
Floating floors are installed using a tongue-and-groove or interlocking system, which allows the planks to move slightly. Over time, several factors can cause gaps to form:
- High foot traffic: Constant walking on the floor loosens the interlocking system.
- Expansion and contraction: Changes in temperature and humidity make the planks expand and contract, creating tension between boards.
- Wear and tear: Everyday use eventually weakens the joints, especially in busy areas.
Understanding the cause helps prevent future gaps and ensures you choose the best repair method.
Method 1: Suction Tool with Super Glue (Best for Smooth Floors)
This is the most reliable method for smooth or lightly textured flooring:
Steps:
- Clean the gap: Use a toothpick or small wooden stick to remove dust, hair, and debris. Avoid metal tools to prevent chipping the floor.
- Apply glue: Use a thin bead of super glue (like CA1 glue) inside the gap. Don’t use too much, as excess can spill onto the floor.
- Use the suction tool: Place the suction cup over the gap and gently tap with the mallet to close the gap.
- Let it dry: Avoid stepping on the repaired area for 10–30 minutes to allow the glue to set.
Tip: If the floor has heavy texture, the suction tool might not work effectively.

Method 2: Double-Sided Tape (For Textured Floors)
For floors with heavy textures where suction tools fail:
Steps:
- Clean the gap with a toothpick and vacuum.
- Stick strong double-sided tape inside the gap.
- Press the floor plank with a mallet to close the gap.
- Repeat for each affected area.
Benefit: This tape is reusable, easy to remove, and doesn’t leave residue on your floor.
Method 3: The Shoe Method (Quick and Free Option)
If you need a quick fix without tools:
Steps:
- Clean the gap thoroughly with a toothpick and vacuum.
- Apply a small amount of glue if desired.
- Using a sturdy shoe, gently kick or tap the plank to close the gap.
Note: This method works best for minor gaps and floors that are slightly loose. It’s not recommended for multiple or wide gaps.
Handling Gaps Near Walls
Sometimes, gaps appear near walls or baseboards. You can:
- Install shoe molding or quarter-round trim to cover the gap.
- Use caulk for small gaps.
- For gaps larger than half an inch, cut a strip from leftover flooring and install it to fill the space.
Tips for Maintaining Your Floors
- Clean gaps regularly to prevent dust and debris accumulation.
- Avoid using metal tools that can damage flooring.
- Monitor high-traffic areas for early signs of gaps.
- Consider moisture-resistant flooring in areas prone to humidity.
Final Thoughts
Floor gaps are normal in floating floors, but fixing them is simple with the right tools and techniques. Whether you choose the suction tool method, double-sided tape, or the shoe method, you can restore the appearance of your floor and prevent further damage.
Pro Tip: For frequent or large gaps, consult a professional flooring service to inspect your subfloor and ensure long-lasting results.